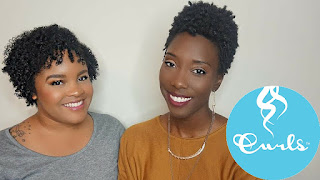
Happy New Year guys!! It's official, this is my very first review/tutorial of 2016 for Curly Hair Products and I'm super hype. I've actually been working on this since 2015 with Dayna (@itsdaynadane) which you probably know if you follow me on SnapChat (@mycandishoppe). It has always been my dream to PROVE that everyone, regardless of hair type, can achieve a Wash + Go. I finally had the opportunity to do so when Dayna refused to believe that she could have 'popping' curls with a Wash + Go.
Using the same techniques as I use on myself, I was able to give Dayna the Wash + Go she never thought she could have.
Step 1: Saturate Hair with Water and Separate Hair into Small Sections
This step is important for a defined Wash + Go. If you want less definition and more volume then use less water and separate into larger sections. Doing your Wash + Go in the shower is ideal but lets be honest, we all don't have that luxury. So, just keep a nice water bottle nearby to spritz your hair whenever it starts to feel like it's drying up.
Step 2: Apply the CURLS Reparative Leave-In Conditioner
This Leave-In Conditioner will serve as your Detangling Agent as well as your Base for the Wash + Go. It's thick, it's creamy and the SLIP will blow your mind. Even in Dayna's 4C Hair, the Reparative Leave-In Conditioner softened up those curls for easy breezy detangling. The Conditioner will also prep your curls for the Styling Product by beginning to get those curls popping. Some girls could probably even use the Leave-In Conditioner on it's own in the warmer months. Real talk.
Step 3: Apply the CURLS Twist + Define Cream From Root to Tip
Section by section, apply the Twist + Shout Cream from root to tip. It is so important that you don't just apply the product on the ends. Going from root to tip helps to eliminate frizz in your Wash + Gos. If you have a tighter curl pattern, you are going to LOVE this cream as it has amazing SLIP as well. Also, don't be afraid to use a good amount of product. Many times when you're struggling with frizzy Wash + Gos it's because you're not using enough product initially. At first it may seem like too much product because you're not use to it, but once you see those results I'm sure it will become second nature!
Step 4: Smooth and Rake the Product Through Your Hair Until Your Curls are Smooth
When applying your product, it's important that you take the time to actually smooth your hair as you go. Consider how smooth you like your hair to be for Twists. This is essentially how you should be smoothing your hair when doing a Wash + Go. Obviously, the curls will pop and it won't stay "straight" from smoothing but the result will be defined, frizz-free CURLS (pun intended). Girls with tighter curls should also be careful which Styling Product they use for this step as you want something to LOTS of slip like the CURLS Twist + Define Cream. If you're having trouble raking the product through your hair or if it's causing tangles then you're using the wrong product for your Wash + Go.
Step 5: Separate Curls (by shaking head or using hands) Then KEEP HANDS OUT OF HAIR
I can't tell you how many Wash + Gos I ruined from HIH Syndrome (Hand in Hair Syndrome)!! When those curls are looking all juicy and popping, it's so tempting to touch just one... and then another one... then stretch one. STOP. Once, your hair starts to dry it's important to leave it alone and not to touch until it is completely dry. If you find that your curls are sticking together, try shaking your head vigorously to loosen the curls without actually touching them. If you are like Dayna and get headaches from all that head shaking then just be patient and separate the curls once they dry completely.
THAT'S IT! If you too have been struggling to achieve a Wash + Go on your tight curls, then watch along below to see how exactly we did it!


Amazing and Easy Steps of Wash Hair & Get Hair Healthy With Awesome HairStyles
ReplyDelete